This page is for showing you how to use PDF Compressor for Mac and there are several steps in the following contents:
Download and install
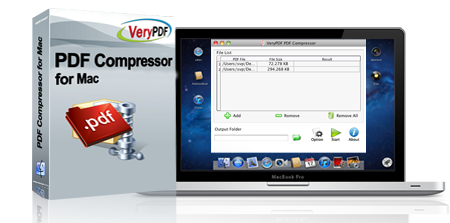
Please click here to download PDF Compressor for Mac to your Macintosh. Then please double click the installer and you need to follow the installation wizard to fulfill the installation procedure. After that, you can double click the application icon to open it and you will see the main interface of PDF Compressor for Mac like the one shown in Figure 1.

Figure 1
Add or remove PDF document
Please click Add button for opening the file picker window in which you can select PDF document (s) that need to be compressed and then click Open button to add it into the file list of PDF Compressor for Mac. If you want to delete some file from the list, please click the file and click Remove button. If you need to clear the file list, just click Remove All button.
Compress image in PDF
Please click Option button to open Option dialog box. If you want to compress the images in PDF document, please check Image option on the left. Please see Image Tab in Figure 2.

Figure 2
In this tab, you are able to compress color, gray or monochrome image. In Downsample Type spin box, you can choose the method as Bicubic, Close, Subsmaple or Average. In Downsample Resolution edit box, you can manually specify the image downsample resolution. In Compress Mode spin box, you can choose the compress method for the image as Auto, ZIP, RLE, JBIG2, CCITT Group 4 or JPEG.
Compress fonts data in PDF
If you want to compress the fonts data in PDF document, please check Fonts option and you will see Fonts Tab like the one shown in Figure 3.

Figure 3
There are three compression methods for the fonts in PDF document: Embed All Fonts, Compress Fonts and Subset Fonts. You can check any one (s) or them according to your needs to reduce the size of PDF document.
Encrypt PDF
PDF Compressor for Mac can also encrypt PDF document on your Macintosh. Please click Security option and you will see Security Tab as illustrated in Figure 4.

Figure 4
You can input user password or owner password in User Password or Owner Password edit box. There are also four permissions matching for Owner Password and you can check any one (s) of them.
Edit PDF description
In PDF Compressor for Mac, you can easily edit PDF description. Please click Description option to open Description Tab. Please see it in Figure 5.

Figure 5
You can edit Title, Author, Subject, Keywords, Creator and Producer for input PDF document. The application PDF Compressor for Mac also supports to create PDF/A document which suites to be saved for long term.
If you have set done all parameters, please click Apply button. If you want to set them all again, you can click Reset All. The button Cancel is for closing this dialog box.
Compress PDF
When you see the interface of PDF Compressor for Mac again, please input the output path for created PDF in Output Folder text box. You can also click the side button to open the window in which you can choose or create a new folder to save the target file. At last, please click Start button to starting the compression.
If you have any questions about PDF Compressor for Mac, please contact us.
 VeryPDF Cloud OCR API
Web to PDF Converter Cloud API
HTML to Image Converter Cloud API
Free Online PDF Toolbox
  Free Online Advanced PDF Converter
Free Online PDF Compressor
Free Online PDF Splitter
Free Online DOCX to DOC Converter
Free Online Word to PDF Editor
Free Online ShareFile
Free Online RSS Feed to Email
 Free Online Web Site to PDF Maker
Free Online URL to PDF Converter
Free Online PDF to Word Converter
Free Online PDF to Image Converter
Free Online URL to Image Converter
Free Online Image Converter
Free Online DOC to PDF Converter
Free Online OCR Converter
Free Online PDF Merger
Free Online PDF Stamper
Free Online PDF Page Resizer
 Free Online Photo Slideshow
Free Online File Converter
  Online PDF to Excel Converter


 $29.95


 Use As


 You may like these products


